There are many different types of email accounts you can add to Outlook, including Microsoft 365, Gmail, Yahoo, iCloud, and Exchange accounts.
Some third-party email providers, like Gmail, Yahoo, and iCloud, require you to change some settings on their websites before you can add these accounts to Outlook.
These steps are the same whether you’re adding your first email account or additional email accounts to Outlook.
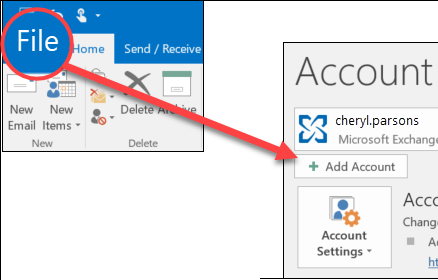
- Select File > Add Account.
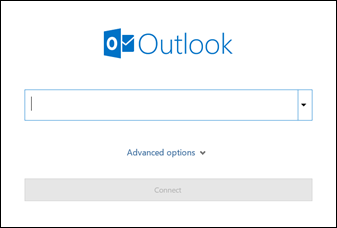
- What you see next depends on your version of Outlook.For Outlook for Microsoft 365 and Outlook 2016For Outlook
- If prompted, enter your password again, then select OK > Finish to start using your email account in Outlook.
Outlook won’t accept my password #
If Outlook won’t accept your password and you know you’re using the password for your email account, you might have an email account that requires additional security.
Gmail, Yahoo, iCloud, Outlook.com, and AOL accounts all use two-factor authentication to help verify that you’re the person trying to access your email account.
To add your email account to Outlook, you’ll need an app password, also known as an application password. This is a different password than your regular email account password. One way you’ll know you need an app password is if you see the following message: 2-factor authentication is set up for your account. Please sign in using your application password.
Problems adding your email account? Use advanced setup. #
You may need to manually add your email account. Choose from one of the advanced methods below:
Use advanced setup to add a POP or IMAP email account in Outlook for Windows #
If you need to enter specific values for incoming and outgoing server names, port numbers, or SSL settings, you can use Outlook’s advanced setup option. You can use these instructions to add a POP or IMAP account to Outlook.
- Open Outlook and select File > Add Account.
- On the next screen, enter your email address, select Advanced options, then check the box for Let me set up my account manually and select Connect.
- Select your account type. Most of the time when you need to use this option, you’ll select IMAP.
- The Account settings screen should be pre-populated with most of the account settings you need. However, if you need to look up your settings, see the POP and IMAP account settings topic. Enter your incoming and outgoing server settings and then select Next.
- Enter your password and then select Connect.
Use advanced setup to add a third-party MAPI email account to Outlook for Windows #
If you are using a third-party MAPI provider, download and configure the MAPI email provider application as suggested by provider company.
- Open Outlook and select File > Add Account.
- On the next screen, enter your email address, select Advanced options, check the box for Let me set up my account manually, and select Connect.
- On the Advanced Setup screen, select Other.
- On the Other screen, choose the type of server to connect to from the list.
Note: The Other option and your account type listed under it will only appear if you’ve properly installed and configured the MAPI provider. - Click Connect.
- The third-party MAPI provider application installed on your machine should launch.
- Finalize the account setup by following the MAPI provider’s instructions.